Yearly Archives: 2018

18.06.15 Release [Beta]

System Changes

  • Late Fee – you can now specify a specific number of days after a bill is due to apply a Late Fee (X Days After Due).
  • Customer Portal Balance – customer portal now warns when overpaying on the account balance instead of the amount due.

Features

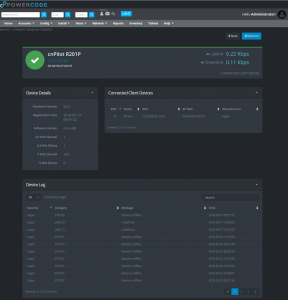
  • Created new cnMaestro page for Access Point data.
  • Created new cnMaestro page for Subscriber Module data.
  • Redesigned the Add / Update Services page.

Miscellaneous

  • Fixed description wrapping off-screen in the transaction log list.
  • Fixed an issue where equipment that wasn’t rate limited would block anything else from being limited.
  • Search now retains search results when a session expires through the Staff Portal.
  • Fixed an issue with saving contact information, specifically passwords.
  • Network Site files will now delete fully.
  • Fixed an issue where changing a customer to archived status from a Scheduled Event would fail to fully archive the customer.
  • Customers will now be redirected to a Success page when completing a payment in the Customer Portal.
  • Fixed an issue where timestamps would generate incorrectly in the Customer Portal.
  • Updated procera data types to prevent issues with syncing service data.
  • Saisei assured and restricted settings now save properly.
  • Fixed network sites View on Map link to function properly.
  • Event logs for address changes no longer improperly label latitude as longitude.
  • Device reboot button no longer shows if a cnMaestro device is in bad status.
  • Fixed issues with loading correct census blocks for the FCC 477 report.
  • CustomerID no longer opens transaction history in the Account Class report.
By |2018-06-20T16:20:24-05:002018 June 15th|Changelog|Comments Off on 18.06.15 Release [Beta]

Automated System Emails

Powercode provides automatic emails to provide top-notch communication to your customers and alert employees of important events within the system. If you haven’t looked at your system emails lately to see what’s active and what’s not now would be a great time to review them. At the time of this article we have thirty different events that can send emails to the contact(s) listed on an impacted account. There are thirteen different triggers to let employees know of changes that they should be aware of and one for anyone who has a schedule set up.

Send Event Triggers
Send to Customers Send to Internal Users
Account Created API Error(s) Detected
Account Disconnection BMU Status Change
Activated for First Time Customer Delinquency Alert
Completed Portal Password Reset Inventory Min Stock Level Alert
Contract Expires in X Days Jobs Completed Notification
Credit Card Expires Next Month Network Notification
Customer Portal Ticket Updated Paging Suppression Disabled
Customer Portal Username and Password Paging Suppression Enabled
Customer Submitted Payment Ticket Created or Modified
Daily Bandwidth Report Ticket Follow Up Reminder
ECheck Auto-Reconciliation Failed Ticket Responsible User/Group Changed
Email Generated Receipt Ticket Status Changed
Email Past Invoice Ticket Technical User/Group Changed
Financial Transaction Failed
Financial Transaction Successful Install/Service Call Scheduled (For User Scheduled)
Installation Scheduled
Manual Payment Entered
Monthly Billing Complete
No Automatic Card Set
Payment Refund Completed
Positive Balance on Bill Day
Positive Balance X Days Before Bill Due By Day
Positive Balance X Days Before Grace Period Ends
Requested Portal Password Reset
Send Call Log
Send Email X Days Before Billing
Service Call Scheduled
Status Changed on Account
Ticket Created or Updated
Used Percentage of Allotted Bandwidth

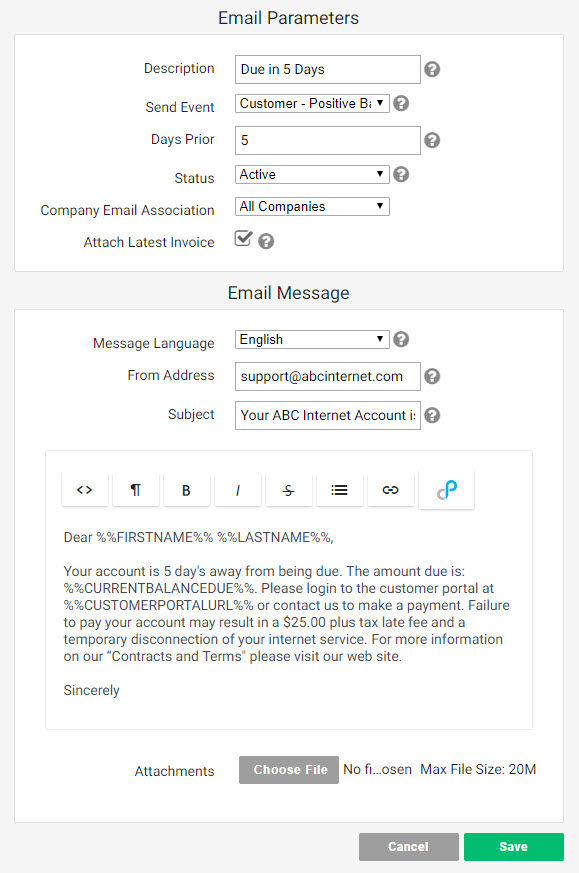
From the ‘Config’ tab a the top and select ‘System Email’ to see which emails are currently setup, check the status column to see if they’re actively in use or not. If you don’t see an email you want already in the table, click on the ‘+Add System Email’ button in the upper left. Name the email in the ‘Description’ field and chose what should trigger it from the ‘Send Event’ drop down. Note that some events allow for a ‘Days Prior’ field. The email can be set to only send for one of your companies or all from the ‘Company Email Association’ field. The option is given to include the latest invoice each time this email is triggered, this is only recommended for new billing or delinquency warning emails. Set the from address and subject for the recurring message. Fill out the body of the email which gives basic formatting features including hyperlinking. Choose a attachment if relevant and click ‘Save’.

Make sure you are taking advantage of the dynamic variables to personalize the message to each customer. Click on the Powercode logo on the far right of the email body to show the available fields that will be populated by the associated info from each customers account, see the chart below. In addition to providing details about the triggered event this is a good way to encourage use of customer portal or provide other helpful info about their account.

Dynamic Variables
Customer Name Customer ID
Customer Notes Security Code
Contact First Name Contact Last Name
Contact Email Address Contact Home Phone
Contact Main Phone Contact Work Phone
Contact Mobile Phone Current Time
Customer Status Total Bandwidth Used (GB)
Total Bandwidth Allowed (GB) Bandwidth Remaining (GB)
Customer Portal Username Customer Portal Password Reset Link
Current Balance Total Current Balance Due
Company (ISP) Name Today’s Date
Yesterday’s Date Customer Portal URL
Physical Address Physical Street 1
Physical Street 2 Physical City
Physical State Physical Zip Code
Latitude Longitude
Next Bill Cycle Day

When Powercode was installed default system emails were loaded with generic messages. It is a good idea to review each and make sure it captures your company’s messaging tone and includes the info you want for each type of event. To do this from the action column click the ‘Select an action’ drop down and choose ‘Edit’, then do it again on the next page. Edit your message and take full advantage of the dynamic variables.

By |2018-06-08T14:34:44-05:002018 June 8th|News|1 Comment

Templates for Jobs

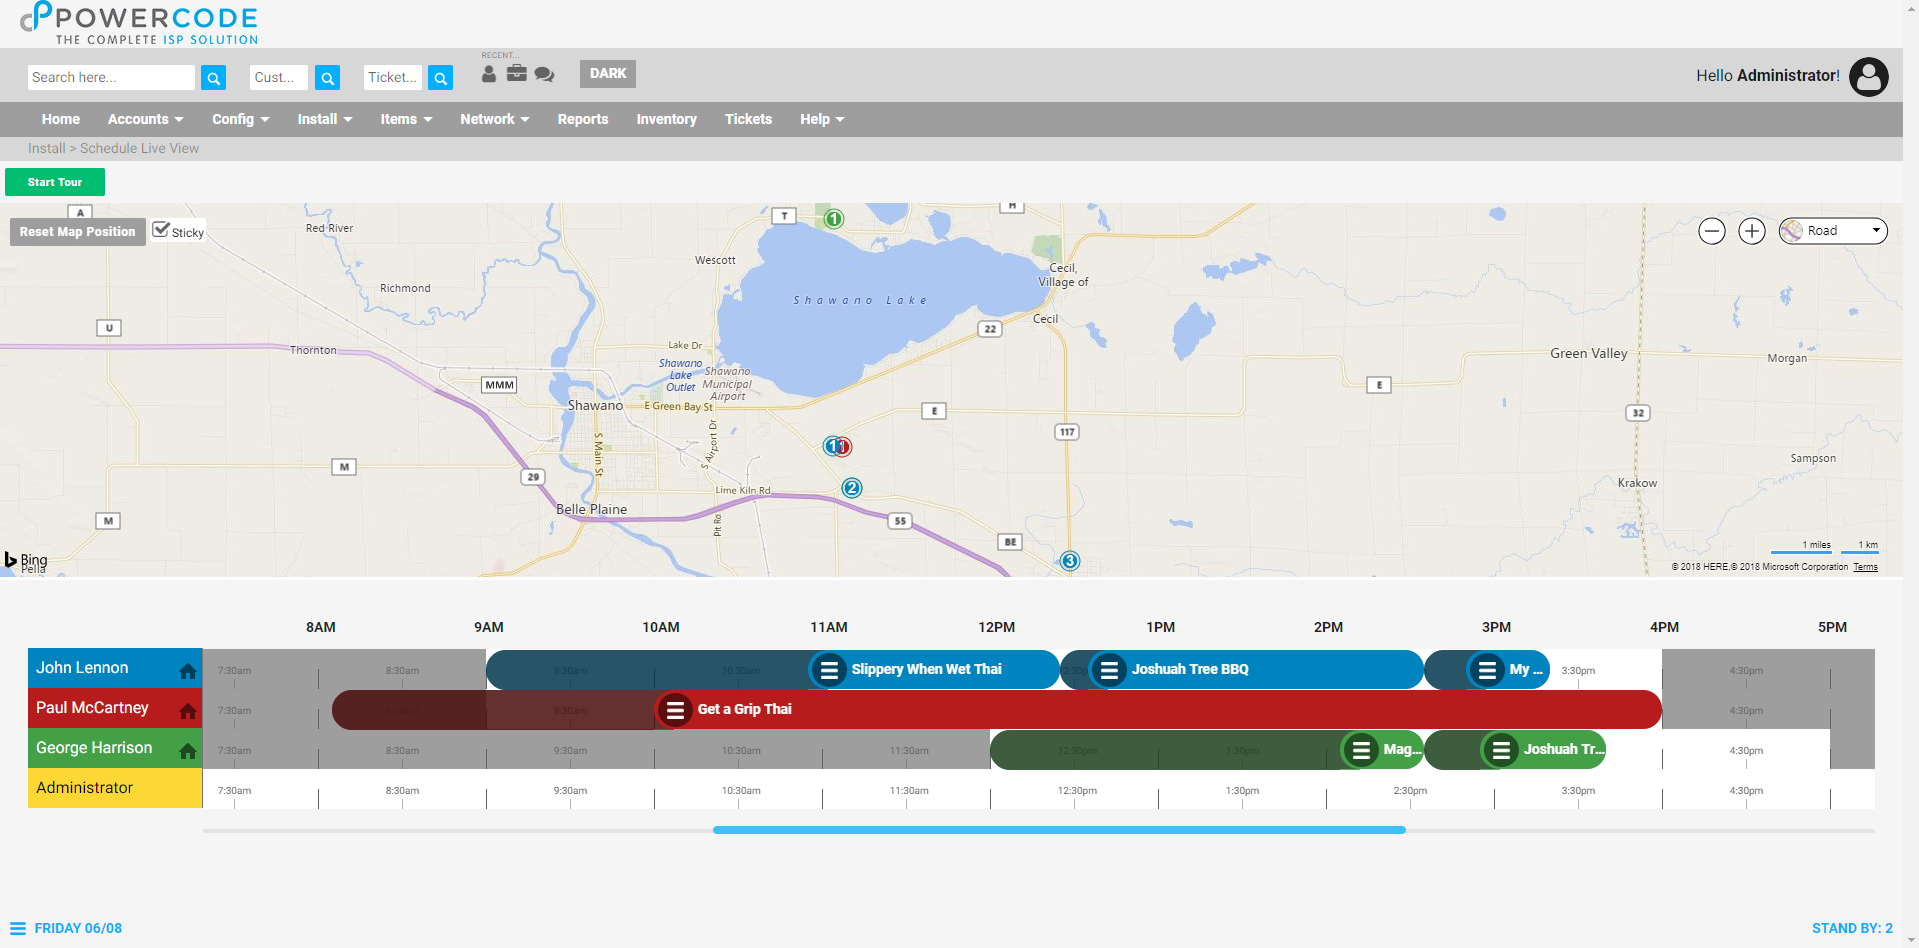
Effective use of templates is a great way to increase efficiency, visibility and productivity in your field tech teams. Days can be completely filled with jobs eliminating waiting around and managers can set mandatory fields for text, numbers or files (images) to guarantee the right information is being recorded for the specific job that was done. There’s also a ‘Request Rescheduling’ checkbox on the failed templates which drops the job into the stand-by list to make sure these not completed jobs don’t slip through the cracks.

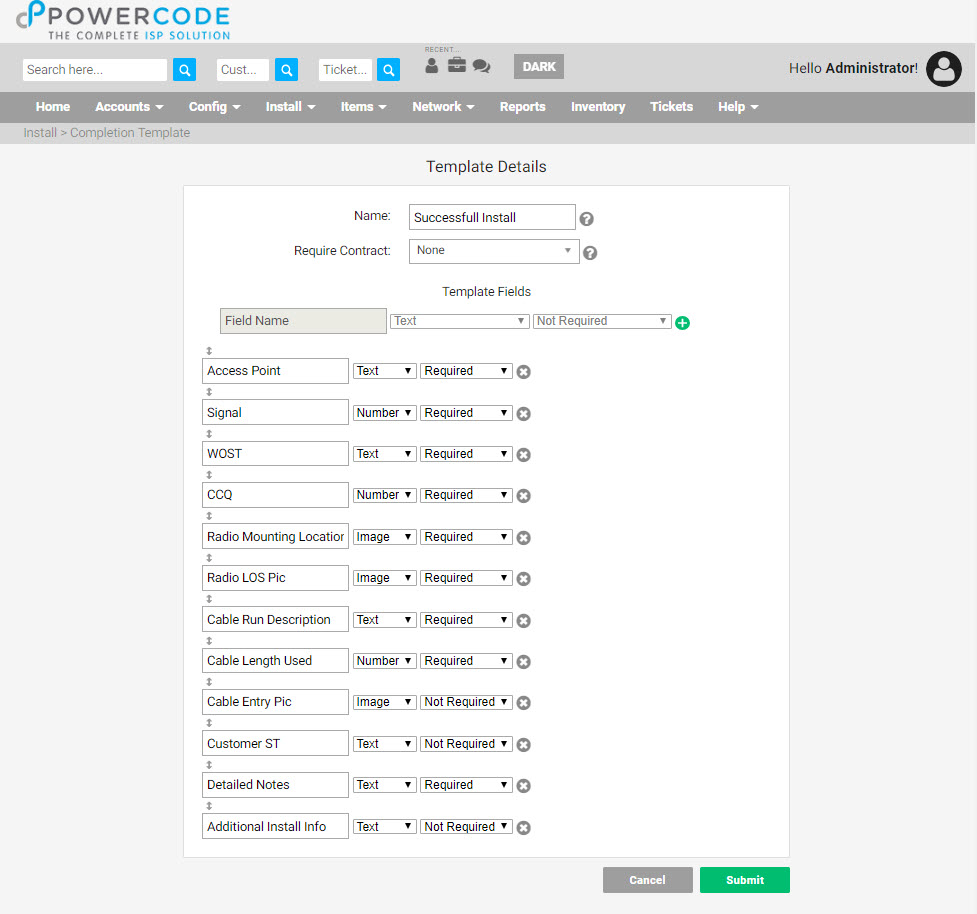
To begin using templates start by creating a ‘Completion Template’ from the ‘Install’ tab. Give the template a name, be sure to include if it’s of the success or fail variety, and if it should bring up a contract at completion for the end user to sign. From there add the fields of your choosing for text, number, image, file or selection and if each is mandatory to complete the job. For an install, some popular fields are speed test of the radio, signal strength or other radio stats and length of cable used can be handy too. A picture of the install itself can be used for training and a picture of the radio’s view to the access point can help with troubleshooting in the future. The ‘Completed Jobs’ report will show the successful and failed jobs by ‘Job Template’ based on a date range with all of the completion fields for helpful analysis.

The same completion template can be used for one or many different jobs so only make additional ones to capture different information.

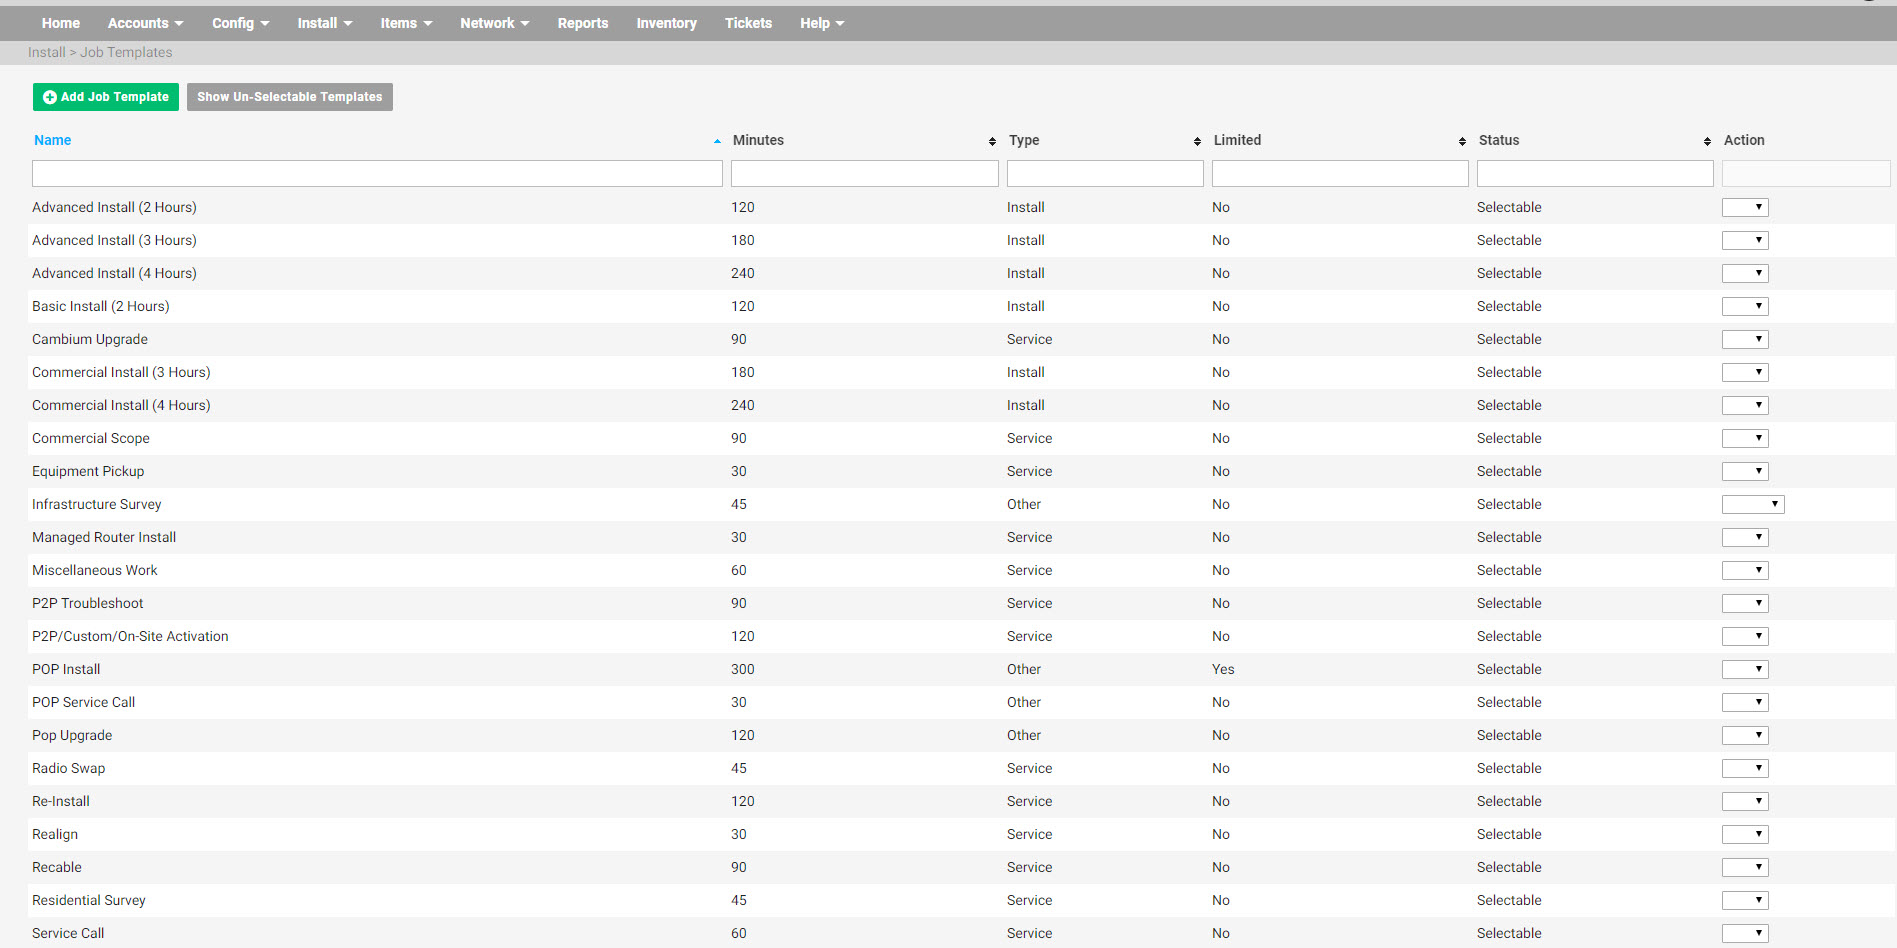
These completion templates can now be added to ‘Job Templates’ also under the ‘Install’ tab. It’s encouraged to create a new job template for each type of job a tech might do as opposed to just having an install or service call. A realign shouldn’t take the same amount of time as a cable run nor would the information needed on completion be the same. Then over time comparing these job types to the historical check-in/check-out duration data it can be seen whether the time given to complete is sufficient, too little or too much. Take note that in addition to the basics of name minutes and type can be set to not show drive time or require notes. Also, jobs can be restricted to specific techs which is helpful when applied to some of the more complex or involved scenarios.

By |2018-06-01T18:23:13-05:002018 June 1st|News|Comments Off on Templates for Jobs

Release 18.05.29 [Beta]

Bug Fixes

  • Fixed a case where cnMaestro would fail to connect to its API.
  • cnMaestro event logs now display in the correct order.
  • Fixed cnMaestro link contrast on good-status equipment on the Customer Overview.
  • Fixed an issue where FCC Form 477 would fail to correctly obtain new FIPS information.
  • cnMaestro no longer tries to fetch all clients when loading a specific device information.

Miscellaneous

  • Added ability to reboot a device through cnMaestro.
  • Re-skinned Customer Balance Detail report.
By |2018-06-20T16:21:02-05:002018 May 29th|Changelog|Comments Off on Release 18.05.29 [Beta]

Release 18.05.28 [Stable]

Bug Fixes

  • You can add tickets on the Customer Overview again.
  • Fixed an issue checking if a customer is on a Saisei BMU.
  • Call log contents no longer stretch past its container.
  • Fixed a case where accounts would falsely activate as if they were a new account.
  • Saisei usage graph now works when there is no usage on the account.

NOTE: This release does not include items from the 18.05.24 BETA. If you would like to retain these features, please upgrade to the subsequent 18.05.29 BETA.

By |2018-06-20T16:21:11-05:002018 May 28th|Changelog|Comments Off on Release 18.05.28 [Stable]

18.05.24 Release [Beta]

New Features

  • cnMaestro Integration – adds the ability to integrate cnMaestro with Powercode.
    Fetches device and client data and displays data in the cnMaestro page.
  • SubscriberWise Integration – allows you to perform soft credit checks on customers in the Add Customer Wizard.

Bug Fixes

  • Fixed a display issue with unselectable services.
  • MikroTik no longer floods the logs with version spam.
  • Fixed missing Allow / Deny mode option for MikroTik BMUs.
  • Fixed a redirect issue when resetting a password through the Customer Portal.

Miscellaneous

  • Added the ability to create custom policies for Saisei and add those policies to a Service.
  • Added a webhook for when a customer deletes a credit card.
By |2018-06-20T16:21:28-05:002018 May 24th|Changelog|Comments Off on 18.05.24 Release [Beta]

18.05.23 Release [Stable]

This stable release is the first stable release since 18.03.21. Some of the highlights include:

  • NEW Customer Portal complete with bugfixes and many new features!
  • Service Areas – you can now specify which service areas you cover, including support for International customers!
  • Saisei BMU Integration – fully integrate the power of the Saisei BMU into your network within Powercode.
  • FCC Monthly Backups & Sticky Settings – you can now specify FCC 477 export settings on a per-service basis, and Powercode now automatically saves your FCC data every month!
  • Twilio Dashboard – you can now send out SMS messages, view replies, and see metrics for your Twilio usage from the Twilio Dashboard in Reports.
  • Over 50 system changes and enhancements to make Powercode work better.

Be sure to check out everything that’s been added! In addition to these couple changes:

Bug Fixes

  • Fixed bandwidth gathering from not initializing properly for Saisei.
  • Editing non-monthly internet services now correctly loads FCC sticky settings.
  • System event log for schedule overrides no longer inaccurately sets the user as admin.
  • Customer portal mobile menu now has the correct background.
  • Twilio logs link in the Twilio configuration page now links to the correct location.
  • Fixed an issue where internal ranges were being applied to every BMU regardless of type.
  • Fixed several issues with VoIP service comparisons.
  • You can now override service costs to $0 again.
  • Fixed an issue preventing BMUs from being added.
By |2018-06-20T16:21:43-05:002018 May 23rd|Changelog|Comments Off on 18.05.23 Release [Stable]

Scheduled Events

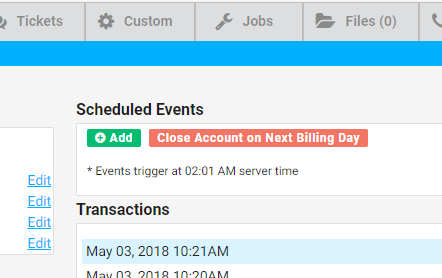
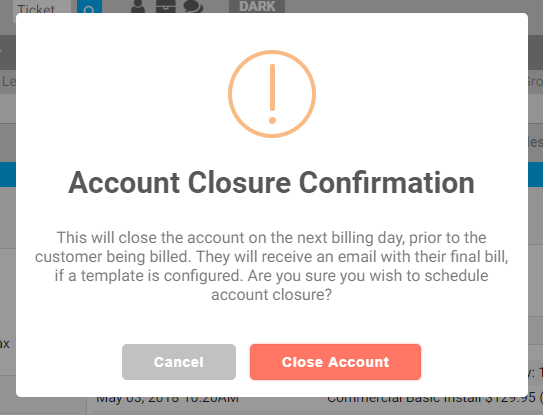
From the billing tab above the ‘Transactions’ window lives a handy tool called ‘Scheduled Events.’ The ‘Close Account on Next Billing Day’ button allows your customer to stay active for the remaining billing cycle they’ve already paid for but cancel the account prior to the next bill cycle and be sent a final bill.

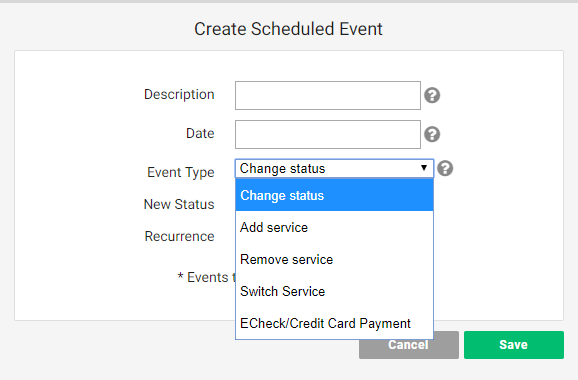
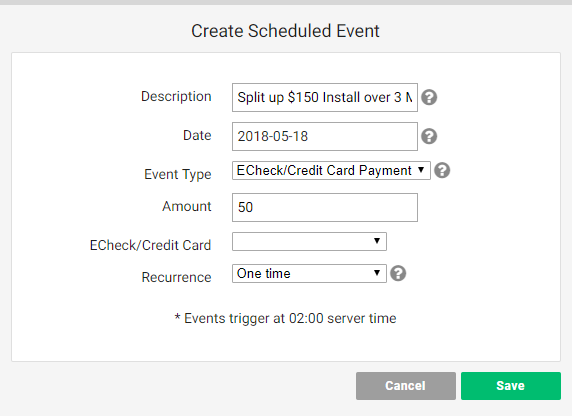
The green ‘+Add’ button brings up the ability to schedule a payment, add/remove/switch services or change the status of an account on a set date. Any of these actions can be set to occur only once, every month or annually. Scheduling a payment can be used to split up an install fee or other large amount over a few months. It’s also useful in tandem with setting a temporary grace period ensuring a customer’s payment gets automatically applied before the account is disconnected. Setting an account to change statuses can be handy for customers with vacation homes so they can preset when to turn on and off their service again or for advanced cancellations more than a billing cycle.

A better way to handle customers with second homes it to create a $5 per month ‘Service Hold’ service with a minuscule upload/download throttle allowing the equipment to stay live keeping its place on the access point and maintaining monitoring abilities.  The ‘Switch Services’ event type can then be used to turn effectively turn on and off the customers service by moving to and from this new limited service. Automatically switching services is also a great way to let a customer trial a higher level package, especially if you’re unsure about delivering the committed speed. Just add the upsold service now and then advise the customer to call back in two weeks to confirm they want to stay on the new service or it will automatically switch back to the original one. Then create a scheduled event to switch the service back. Just make sure to pay attention to the billing cycle and the proration check box to accomplish the desired billing.

By |2018-05-18T11:35:06-05:002018 May 18th|News|Comments Off on Scheduled Events
Go to Top