News

Home/News

Powercode Release 20.12.31 [BETA]

API

  • Gets all of customer’s phone numbers when customer record is requested

Baicells

  • Added option to enable/disable Baicells logging

Billing

  • Assessment of fee upon reconnect of a delinquent customer
  • No longer assess $0.00 charges for $0.00 taxes

Customer Portal

  • Use customer’s locale preference in the customer portal, if it is set

Customer Overview

  • Fixed link back to customer overview from Transactions view

Inventory

  • Allow to set a minimum stock level of 0

Mobile View

  • Fixed issue where phone numbers not showing correctly

Schedule Live View

  • No longer showing drive time when Calculate Drive Time is disabled
  • Fixed visual bug hiding hamburger menu from view

Tickets

  • Added option to generate a ticket for a scheduled install
By |2021-01-05T08:49:22-06:002021 January 5th|Changelog, News|0 Comments

Powercode Release 20.12.10 [Beta]

Add Customer Wizard

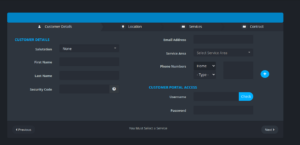
  • Added options to hide fields that aren’t required for customer creation in the add customer wizard configuration.

Authorize.net

  • Resolved an issue where payments were being rejected due the reference ID being too long.

Geolocation Error

  • If a customer’s address is set to automatically geocode and their physical address has a latitude or longitude of zero it will attempt to geolocate and update the coordinates.

Webuser Accounts

  • Resolved an issue where updating a webuser profile would fail to update if the phone number didn’t have a value.

Inventory API

  • Introduce a UAPI endpoint for inventory management via restful json API.

Bug Fixes

  • Resolved an issue with the handling of UTF-8 characters in tickets.
  • Resolved an issue where the check-in timer on installer mobile view wasn’t calculating the time correctly after refreshing the page.
  • Schedule Live View year updates.
  • Fixed duplicating probes when editing equipment.
  • Cash/Check payment issue resolved.
  • Auto selection of ticket status removed.
  • CompleteMap updates.
  • RADIUS credential formatting issues resolved.
  • Generate all action functionality enabled.
  • Saisei graph enhancements.
  • Dropbox authorization code fix.
  • Ticket ID now checked in subject.
  • User not found error resolved.
  • Verify vanilla v20 installations.
  • Fix all groups selection on services.
By |2020-12-10T16:22:42-06:002020 December 8th|Changelog, News|0 Comments

Hotfix Saisei [19.16.20]

Pre-Sasei Patch

  • This patch must be applied prior to the Saisei 7.3.1 Support patch to ensure database updates execute properly.

Saisei 7.3.1 Support Patch

  • Changed the “Synch Policies” button to “Pull Policies from Saisei” to more accurately represent the action.
  • Resolves an issue where rate multipliers would divide incorrectly when pulling the policies from Saisei.
  • Resolves an issue where after synching the Saisei would be set to an “Unknown” status.
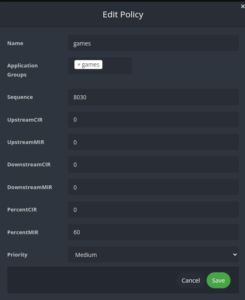
  • Added requirements when adding and editing a Saisei policy.
    • Name, Application Group, Rate Multiplier (.1-10), and Percentage Rate (0-100) are now all Required.
  • Service policies will now take on the Saisei policy attributes by default.
  • When creating a new service all service policies are set to on, the Saisei policy values, and a service rate multiplier of one by default if not set.
  • Groups Allowed Service
    • All Groups is now a switch.  When All Groups is enabled all groups are selected and the option to select individual groups is hidden.
  • Removed assured and guranteed sliders.
By |2020-12-21T10:36:21-06:002020 December 2nd|Changelog, Hotfix, News|0 Comments

Google Maps

Beta release 19.12.05 brings the long anticipated introduction of Google Maps to Powercode. Many new features like street view are added to all mapping elements of Powercode from the Complete Map, to the Schedule Live View and of course the Elevation Profile. The complete map now allows you to filter customer results by not just status, but multiple combinations including equipment status, device type, customer groups and customer tags. Once filtered a polygon, square or circle can be drawn on the map around a set of accounts which can then be exported to a csv.

On the schedule live view you’ll notice a new button in the upper left “Optomize Drive Time” with the current driving time displayed. Clicking on “Optomize Drive Time” will rearrange an installer’s schedule to the most efficient way to lay out their day. We’ve also updated the icons be better display how the day is progressing

To take advantage of these features as well as the new element’s we’ll continue to build upgrade to Beta 19.12.05. Before you do a Google API key must be created. Follow the directions here to set this up.

By |2019-12-05T12:38:52-06:002019 November 29th|News|0 Comments

Job Completion Templates

Job Completion Templates are an excellent way to manage installation/repair quality, keep your technicians accountable and gain valuable insights and trends. These Completion Templates are associated to one or multiple Job Templates, see the Job Templates tutorial here and are displayed when a technician completes a job after checking in on the mobile view of Powercode. The results, which include the option to upload a picture, are stored on the customer account but can also be displayed per completion template type on a report. This report will allow you to see trends in install characteristics such as signal strength or wide open speed tests or whatever else you choose to capture.

Each Job Template needs both a succeed and fail Completion Template. A single Completion Template can be used for multiple Job Templates, this will be common for fail Completion Templates but most likely there will be different things that should be captured on the success Completion Template side. To create a Completion Template, from the global nav bar hover over “Install” and select “Completion Template” then “Add Template”. Give the template a name and then click the green plus circle. For each row provide a name to show on the form and then choose from text, number, image, file or select. That last option provides the ability for a drop down with set multiple choice inputs. Then choose whether the field must have an answer for the form to be submitted. Repeat for each piece of information you wish to collect.

The results of the Completion Template can be found on a customer account under the “Jobs” tab and then from the “Select an Action” drop-down “View Completion Data”.  To see trends or multiple results in one place navigate to “Reports” from the global nav bar and under the “Scheduling & Service Reports” select “Completed Jobs”.

By |2019-04-04T12:44:54-05:002019 April 4th|News|0 Comments
Go to Top