Posts

Release 18.07.16 [Stable]

BMU

  • Saving a BMU will no longer trigger validation that is not associated with the BMU being saved. This would sometimes prevent BMUs from saving properly.

Services

  • One-Time services will now pull available services set to “All” groups. Prior, it would only pull groups set specifically to the WebUser’s viewable group.
  • When cancelling modifying a service, Powercode will no longer try to validate the input fields.

Baicells Integration

  • When adding any non-baicells services customers will no longer be deactivated in BOSS.

CnMaestro Integration

  • Loading access point statistics now attempts to load CnMaestro data using a Mac offset, which should resolve issues with the statistics not loading.
By |2018-07-16T16:54:11-05:002018 July 16th|Changelog|Comments Off on Release 18.07.16 [Stable]

Send Mass Notifications

Things happen in your network and sometimes waiting for upset callers to call in doesn’t provide the best customer service or maybe you’re looking to up-sell some customers into a higher speed service. These are two of the many great uses for the Mass Notification feature in Powercode. From the ‘Accounts’ tab select ‘Send Mass Notification’.  Also note that if you have Twillio SMS integration enabled then there’s the option for sending both text and email with different messages for the same notification.

After entering in the email address the notification is coming from and providing a subject, the body of the message can be created. Notice that this feature has many of the same elements as ‘System Emails‘ including variables tied to customer’s individual data and html formatting ability. From there choose which of the following seven organizational options apply to your message: Status, Service, Customer Group, Network Site, IP Address Range, Children of Equipment, Customer Tags. Multiple sub options can be selected from the same option behaving as an ‘And’ operator to expand the reach of a message. Multiple options can also be selected also functioning as an ‘And’ operator to specify the exact customer criteria to be reached. Be aware that a customer will be included if it meets any one criteria in each option group.

In the example above, an account that was delinquent and served off of the Nordin East Network Site would get this notification as would someone who was active connected to Shawano Toni Tower, but an account with the status of lead off of Nordin East would not. As sub options are being added the two buttons at the bottom update in real time to show how many contacts meet these criteria. Click on the ‘Export X Contacts’ to see exactly who will receive the notification if sent. Make sure to always pay attention to the status as you will rarely want to message accounts that are no longer customers.

By |2018-07-06T11:18:45-05:002018 July 6th|News|Comments Off on Send Mass Notifications

Release 18.07.06 [Stable]

Billing Updates

  • Late Fee – You can now specify when the late fee is applied (X Days After Due), and it no longer is forced to be simultaneous with the account delinquency and shut off.

Monitoring Updates

  • Fixed a few issues with data not being fully collected for graphing purposes, causing no graphs or graphs with chunks missing. The most apparant place being the BMU throughput graph.

Interface Updates

We’re making our way through Powercode and giving various pages some much needed facelifts by implementing a more modern UI. You’ll see us do some basic pages first. We can’t wait for you to see what we have in store for the more forefront pages. Keep an eye out.

  • Re-skinned Customer Balance Detail report.
  • Re-skinned Add/Edit Service page.
  • Re-skinned Add/Edit RMU page.
  • Customer files now sort by filename as the default.
  • Updated several alignment aspects on the BMU Statistics page.
  • Long descriptions no longer go off the screen in the transaction log.

Report Updates

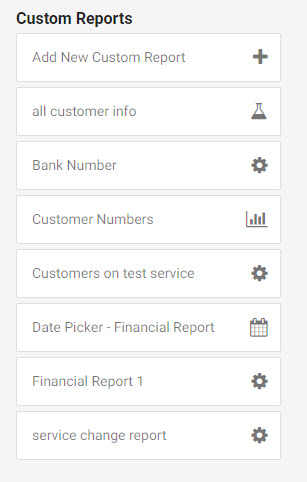
  • New SubAccount Class report has been added.
  • Added missing datepicker selector to the Account and Account Class reports.
  • Avoids a case where FCC Form 477 would fail to correctly obtain new FIPS information.
  • FCC doesn’t like how accurate Powercode’s GPS data can be sometimes when looking up a census block; so we now send it only 5 decimals in the latitude and longitude.
  • CustomerID no longer opens the transaction history from the Account Class report.

Saisei Integration

  • Version shown in Powercode now updates when Saisei is syncronized.
  • New applications and signatures added to catch more streaming.
  • Added the ability to manage Policies from within Powercode.
  • Added the ability to manage Policies within each rate plan along with their assured, restricted, and rate multiplier settings.
  • If any equipment on a customer was set to ignore rate limiting, all equipment on that customer wouldn’t get rate limited. This is fixed and the ate limit setting is now honored per device as expected.
  • Updated the way Powercode actually creates signatures in Saisei to account for existing, custom signatures.
  • Hosts without an access point now get set to ‘<none>’ instead of being empty. This helps with some edge cases that caused issues.
  • Powercode will no longer delete a rate plan from Saisei. It is not necessary to do so and avoids some weirdness on the STM if a rogue host is still attached to that rate plan.
  • Validation was added when setting ‘Internal Subnets’ on the edit RMU page to make sure empty lines were treated as such.
  • Slave BMUs will no longer go into a ‘Bad’ status simply because a service was edited and pushed to Saisei.
  • Tons of stability improvements across the board with various data syncing between Powercode and Saisei.

Preseem Integration

  • Added ability to add Preseem as an RMU – You will NEED to do this if you use Preseem, else some Preseem related functions will stop working.
  • Enabled functionality for bandwidth gathering from Preseem.

cnMaestro Integration

We’ve more or less integrated everything cnMaestro allows us to integrate. We should have some historical graphs showing in a future release soon.

  • Created new view for Access Points.
  • Created new view for Subscriber Modules.
  • Optimize API queries when looking at a single client.
  • Added ability to reboot a device with a button click in Powercode.
  • UI Updates
  • Event Log data is now sorted properly by time.
  • Avoided a case where the API might fail to connect.
  • If a device is ‘Offline’, we now hide the reboot button.
  • For ePMP devices, we will try to display data based on either the Wireless MAC address or the Ethernet MAC address, regardless of which one you enter in Powercode.

Procera Integration

  • Updated data types sent from Powercode to accomodate more recent versions of PRE.

Baicells Integration

  • Update some validation related to API credentials existing or not existing.

Customer Portal

  • Customers will now see a success page when completing a payment in the Customer Portal; provided it was successful.
  • Avoided a case where timestamps might not show properly in the Customer Portal.
  • A warning will now pop up if a customer tries to pay more than their balance from the Customer Portal.
  • Updated SMS opt-in checkbox in the Customer Portal to save more reliably.
  • Some missing data in the database will no longer cause issues when adding credit cards through the Customer Portal.

Misc New Features / Enhancements

  • New trigger for internal emails for customer status changes.
  • Search now retains search results even when interrupted by a logout/expired session.
  • ISP Description field is no longer a required field in the add/edit services page.
  • Disabled Network Sites no longer appear in related selectors.
  • Customer Alerts no longer default to all customers when you didn’t want them to.
  • Event logs for address changes properly label latitude and longitude.
  • View On Map feature from Network Sites now correctly takes you to the right page.
  • Fixed a case where archiving a customer through a scheduled event wouldn’t fully archive that customer.
  • Network Site files will fully delete now rather than leaving remnants on the server.
  • BMU Event Logs sort properly by time again.
By |2018-07-12T14:33:22-05:002018 July 3rd|Changelog|Comments Off on Release 18.07.06 [Stable]

Release 18.06.29 [Beta]

System Changes

  • Powercode no longer deletes rate plans from Saisei as it causes unexpected behavior and deleting them from Saisei is not necessary.
  • We set hosts without an access point relationship in Saisei to ‘<none>’  to avoid some unexpected behavior.

Bug Fixes

  • Customer Alerts no longer push to all users in some cases.
  • We no longer flag Baicells credentials as missing if they’re not actually missing.
  • Disabled Network Sites no longer appear in related selectors.

Miscellaneous

  • Simply opening the edit RMU page will no longer cause the RMU to show as out of sync.
  • More reliably push signatures into Saisei from Powercode.
By |2018-06-29T16:50:31-05:002018 June 29th|Changelog|Comments Off on Release 18.06.29 [Beta]

Release 18.06.28 [Beta]

Bug Fixes

  • Several cases where updates in Powercode would not push properly to the Saisei have been corrected.

Miscellaneous

  • cnMaestro will now try to find the wireless mac if no lan mac is found.
By |2018-06-28T17:07:33-05:002018 June 28th|Changelog|Comments Off on Release 18.06.28 [Beta]

Ticketing Best Practices Webinar TOMORROW!


Have you ever wondered if you’re using ticketing to it’s fullest? Know what categories, types, and groups are for? Know when to use updates and when to use comments? Get the answers to these questions and many more.

Tune in to streamline your workflow and make sure you’re providing your customers with the best experience!

By |2018-06-27T10:49:57-05:002018 June 27th|News|Comments Off on Ticketing Best Practices Webinar TOMORROW!

Release 18.06.26 [Beta]

Features

  • New SubAccountClass report has been added to the Report Dashboard.

Bug Fixes

  • Saisei policies and rate multipliers now push properly to the STM.
  • Updating services with Saisei no longer causes Slave BMUs to kick off into a bad status.
  • Reversed upstream and downstream rate multipliers to match the correct field.
By |2018-06-26T09:23:38-05:002018 June 26th|Changelog|Comments Off on Release 18.06.26 [Beta]

Release 18.06.25 [Beta]

Bug Fixes

  • Overage services didn’t always update new values properly, this has been fixed.
  • Missing config values no longer prevent customers from adding Credit Cards in the Customer Portal.
  • A case where graphs would fail to record SNMP data has been fixed.
  • Twilio Opt-In from the Customer Portal will now toggle correctly.

Miscellaneous

  • Added internal subnet validation when saving.
  • ISP Description is no longer a required field when adding a service.
  • Non-default tabs were showing on page load for services, these are now hidden.
By |2018-06-25T15:34:24-05:002018 June 25th|Changelog|Comments Off on Release 18.06.25 [Beta]

Manage Your Inventory

Managing inventory properly can ensure your tech’s have the equipment they need to complete their jobs, track trends and mitigate theft. Powercode makes it easy to know where every item is once it’s delivered. To begin using the inventory feature you will need to establish all of your products and consumables, click on the ‘Inventory’ tab at the top of any screen then click the ‘Manage Inventory’ button.  The manufacturer and type for each item will need to be built and any vendors should be added too. Stock locations indicate where the items are stored and checked out from so most will only have one unless you maintain a remote stock facility. The ‘Statuses’ and ‘Conditions’ tabs come populated with all the scenarios needed, but the ability to add custom ones for any outliers is still available.

Next make sure to click on the ‘Admin Settings’ button and enter the email address of your purchasing agent or whoever is responsible for keeping equipment in stock. Then click the green ‘Create Product’ button on left hand side under the ‘Products’ tab and add a product for each individual type of equipment that will be tracked. This default information can also be overwritten when entering the actual items into stock. Pay special attention as to whether it is an item with a trackable serial number and MAC or if it’s a consumable and check the box if so. When the count of an item/consumable in a stock location drops below the number set in the ‘Min. Stock Level’ box, a warning email is sent the address established in the aforementioned ‘Admin Settings’ box.

Now the actual items can be added to stock from the green ‘Add Items’ button under the ‘Items’ tab. If multiple of the same item are being added at once, click on the ‘Bulk entry mode’ link with the lock icon. Then click on each lock next to the line that will remain the same for each entered item. Typically that will be for all except the MAC, DUID and/or Serial. A USB barcode scanner can be purchased making input significantly quicker.

When it’s time for a tech to remove an item from the stock room, they simply hit the edit pencil icon next to the item, choose the ‘Staff’ Assignee Type and select their name from the Web User drop down. When it’s added to a customer account nothing further is necessary as it will automatically remove the item from it’s location and add it under the ‘Equipment’ tab of the customer.

To learn more or see it in action watch this video:

By |2018-06-22T11:52:55-05:002018 June 21st|News|Comments Off on Manage Your Inventory
Go to Top