
Google Maps
![]()
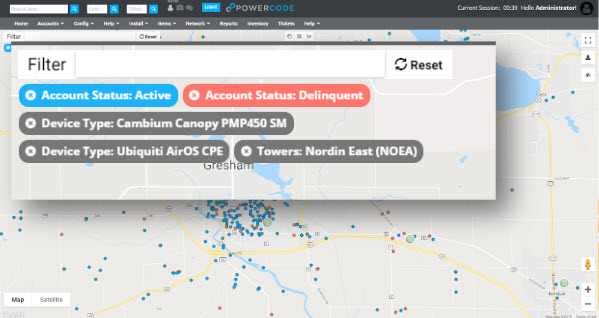
Beta release 19.12.05 brings the long anticipated introduction of Google Maps to Powercode. Many new features like street view are added to all mapping elements of Powercode from the Complete Map, to the Schedule Live View and of course the Elevation Profile. The complete map now allows you to filter customer results by not just status, but multiple combinations including equipment status, device type, customer groups and customer tags. Once filtered a polygon, square or circle can be drawn on the map around a set of accounts which can then be exported to a csv.
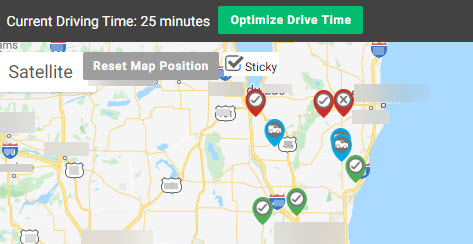
On the schedule live view you’ll notice a new button in the upper left “Optomize Drive Time” with the current driving time displayed. Clicking on “Optomize Drive Time” will rearrange an installer’s schedule to the most efficient way to lay out their day. We’ve also updated the icons be better display how the day is progressing
To take advantage of these features as well as the new element’s we’ll continue to build upgrade to Beta 19.12.05. Before you do a Google API key must be created. Follow the directions here to set this up.