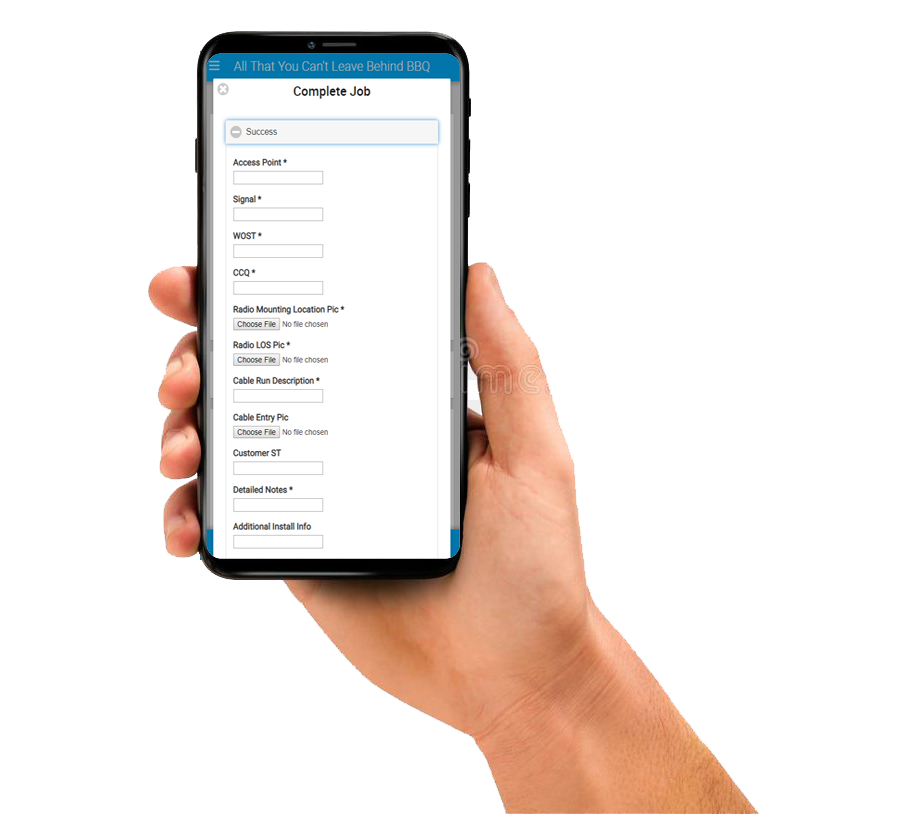
Job Completion Templates are an excellent way to manage installation/repair quality, keep your technicians accountable and gain valuable insights and trends. These Completion Templates are associated to one or multiple Job Templates, see the Job Templates tutorial here and are displayed when a technician completes a job after checking in on the mobile view of Powercode. The results, which include the option to upload a picture, are stored on the customer account but can also be displayed per completion template type on a report. This report will allow you to see trends in install characteristics such as signal strength or wide open speed tests or whatever else you choose to capture.

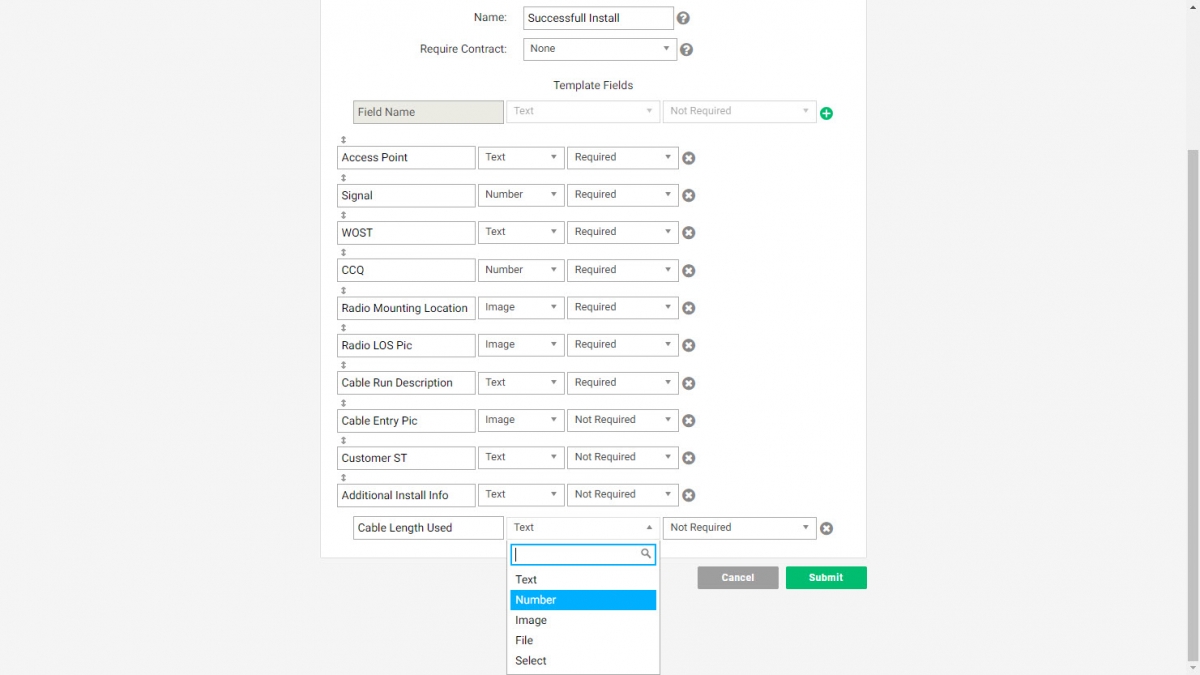
Each Job Template needs both a succeed and fail Completion Template. A single Completion Template can be used for multiple Job Templates, this will be common for fail Completion Templates but most likely there will be different things that should be captured on the success Completion Template side. To create a Completion Template, from the global nav bar hover over “Install” and select “Completion Template” then “Add Template”. Give the template a name and then click the green plus circle. For each row provide a name to show on the form and then choose from text, number, image, file or select. That last option provides the ability for a drop down with set multiple choice inputs. Then choose whether the field must have an answer for the form to be submitted. Repeat for each piece of information you wish to collect.

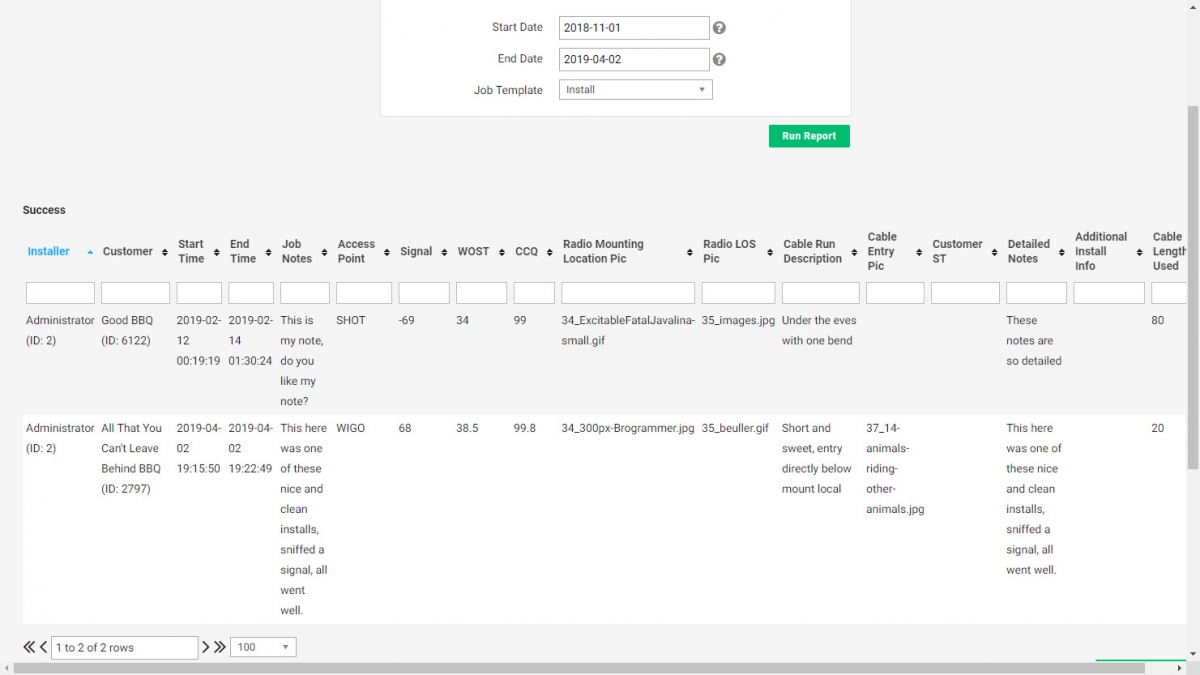
The results of the Completion Template can be found on a customer account under the “Jobs” tab and then from the “Select an Action” drop-down “View Completion Data”. To see trends or multiple results in one place navigate to “Reports” from the global nav bar and under the “Scheduling & Service Reports” select “Completed Jobs”.

