
By default, Customer Tags and Customer Groups can only be modified by users with Administrator or Owner User Permissions.
Customer Tags
Powercode allows you to add any number of identifying Customer Tags to your Customer accounts.
Custom Customer Tags Enable:
- Sending mass emails to Customers with specific Customer Tags
- Write/Request Custom Reports regarding Customers with specific Customer Tags
- Trigger Custom Alert Banners at the top of the Customer Overview for all Customers with specific Customer Tags
- Display all Customer Tags on the Customer Overview.
Creating/Editing Customer Tags:
Navigate to Items > Customer Tags.
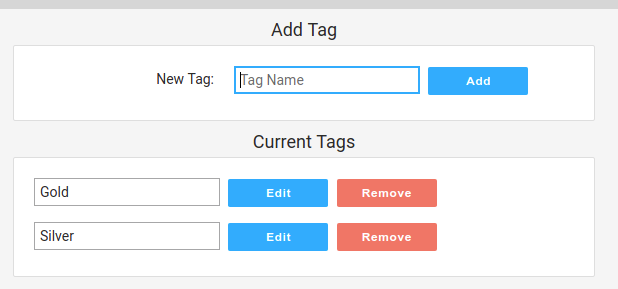
Here you can add Customer Tags or edit and delete existing Customer Tags.
To add a new Customer Tag enter the name of the Customer Tag in the New Tag field and click the Add button.
Adding Customer Tags to Customer Accounts:
Navigate to the Customer account. Then click the Edit button next to the text Account Profile.
Between Group and Account Type fields will be the option to enter Customer Tags. Scroll to the bottom of the screen and save any changes. Only Customer Tags currently present in the system will be available for assignment.
Customer Groups
Each Customer may be added to a single Customer Group.
All functionality available to Customer Tags is available to Customer Groups:
- Sending mass emails to Customers with specific Customer Groups
- Write/Request Custom Reports regarding Customers with specific Customer Groups
- Trigger Custom Alert Banners at the top of the Customer Overview for all Customers with specific Customer Groups
- Display all Customer Groups on the Customer Overview.
Customer Groups also Enable:
- Restriction of Services to certain Customer Groups (under Items> Services)
- If you can only provide higher speed links to a geographical area, you might restrict your higher speed Service to specific Customer Groups. (Redmonton Residential and Redmonton Commercial)
- For FCC reporting and finances it typically makes sense to have separate services for business and residential customers. In this case you may want to restrict residential and commercial Services to the proper groups. (Redmonton Residential, Third Party Redmonton Residential and Indiana Residential for a residential service for customers in Indiana)
- Restricting User Customer visibility to certain Customer Groups (under Config> System Config> Users)
- If you have a third party who will be servicing some number of customers on your account you can add users for Users from that third party without the ability to see customers not in example customer groups. (Third Party Redmonton Residential and Third Party Redmonton Commercial)
Creating/Editing Customer Groups:
Navigate to Items > Customer Groups.
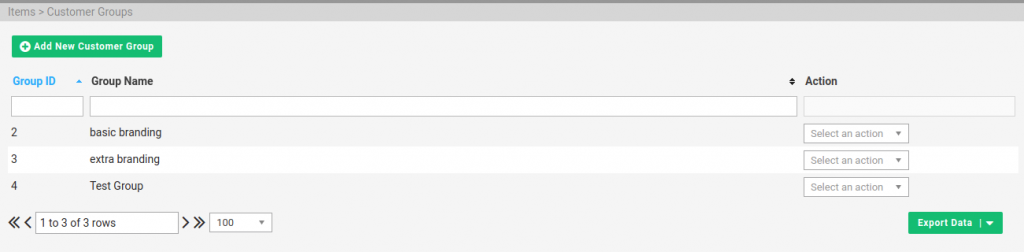
Here you can add Customer Groups or edit and delete existing Customer Groups.
To add a new Customer Groups click the Add New Customer Group button. You may also use the Select an action dropdown on the right to rename or delete a Customer Group.
Adding Customer Groups to Customer Accounts:
Navigate to the Customer account. Then click the Edit button next to the text Account Profile.
Between Referred By and Customer Tags fields is a dropdown allowing you to select a Customer Group. Scroll to the bottom of the screen and save any changes. Only Customer Groups currently present in the system will be available for assignment.